Paper Mache
Part 2 – Making the Paper-Mache Mask
MATERIALS
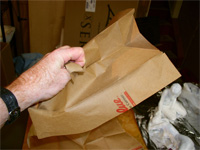
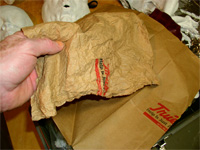
Brown paper bags – The kind you get at the supermarket. It’s best product for a super strong and durable paper-mache. You need to break up the fibers a bit, however. This is done by crumpling up large pieces over and over until the paper is very soft, like a Kleenex almost. Boring? Time consuming? Can’t I buy something that is just as good, you say? Sorry, there are no shortcuts if you want the best. Besides, this is a great exercise for your forearms and wrists; a must for any sculptor. I usually do it while watching the news; helps relieve tension...
After the paper bag (or sack, if you're from England) is soft, rip it into small squares, approx. 1”. It actually works best to rip and not cut the pieces as the fibers that remain on the ripped edge add to the tensile strength of the finished mask.
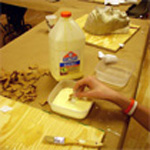
Carpenter’s wood glue – Again the most durable choice. It tends to be too thick right out of the bottle so I usually add a little water, very little. 3/4 glue to 1/4 water is enough.
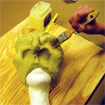
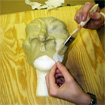
You first need to coat your sculpture with a good release agent to prevent the paper-mache from sticking to the clay when you remove it. I recommend good old petroleum jelly applied with a small paint brush. Be sure to cover all of your sculpture especially the grooves and crevices.
Before we apply the paper-mache, it’s best to put a coating of paper towel dipped in water on the sculpture to assist in the release. Apply it the same way you would the paper-mache, by ripping small pieces, dipping in some water and applying onto your sculpture. To get into the grooves and crevices push the paper towel pieces with a small paint brush. Don’t wait for this coat to dry.
Proceed with your 1st coat of paper-mache. Dip the small pieces of bag in the glue mixture and apply directly on the sculpture, making sure to overlap the torn edges. Again, push paper into grooves and crevices with a moist paint brush to retain the lines in your sculpture.
Allow to dry. A small fan will speed up your drying time.
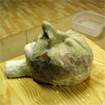
Apply 2 more coats of paper-mache for a total of 3. Allow the outside to dry thoroughly to a hard shell.
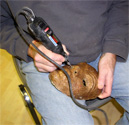
The next day trim away the excess paper from the edges with a mat knife. Flip over and carefully remove the clay with a wire sculpting tool. If the mask is still too difficult to lift off, the easiest way to get it to come off easily is to heat it. I stick it in an oven heated to only 150 degrees for about 10 minutes. The clay will soften and you will easily be able to lift the mask off the sculpture. The mask itself will soften slightly from the heat but will retain its shape and strength. Set it aside to cool for a few minutes and it will harden again quickly.

Wipe off any petroleum jelly residue and let inside dry.
Trim the shape with a scissors and the eye and nose holes with a Dremel tool or mat knife.
Hot glue the strap to the sides of mask at a point even with the top of the eye holes. I hot glue little pieces of foam to the inside to ensure a comfortable fit.
Sand smooth and apply a coat of gesso before painting.
